Peel and stick murals are a fantastic way to add personality and style to any room. They are easy to install, versatile, and can transform a space in minutes. However, to ensure that your mural remains vibrant and intact for years to come, proper care is essential. This article will guide you through the steps to extend the life of your peel and stick mural through proper care.
I. Understanding Peel and Stick Murals
Definition and Types of Peel and Stick Murals
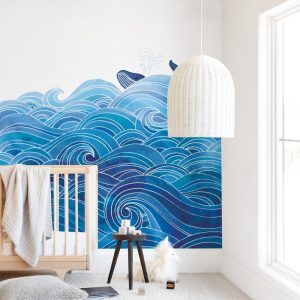
Peel and stick murals are large-scale wall decals that can be easily applied and removed without damaging the wall. They come in various designs, from scenic landscapes to abstract art, and are made from materials like vinyl or fabric.
Benefits of Using Peel and Stick Murals
- Easy Installation: No need for glue or paste.
- Removable: Can be taken down without leaving residue.
- Versatile: Suitable for various surfaces like walls, furniture, and even ceilings.
- Cost-Effective: A budget-friendly way to redecorate.
II. Preparing Your Wall for Installation
Cleaning the Wall Surface
Before installing your mural, ensure the wall is clean. Remove dust, dirt, and grease using a mild detergent and water. A clean surface ensures better adhesion.
Ensuring the Wall is Dry and Smooth
Make sure the wall is completely dry before applying the mural. Any moisture can affect the adhesive. Also, the wall should be smooth. Sand down any rough patches if necessary.
Priming the Wall if Necessary
If your wall has been recently painted, wait at least two weeks before applying the mural. For best results, consider priming the wall, especially if it has a textured surface.
III. Proper Installation Techniques
Tools Needed for Installation
-
- Measuring tape

- Level
- Squeegee or credit card
- Utility knife
- Pencil
Step-by-Step Installation Guide
- Measure and Mark: Measure the wall and mark where the mural will go.
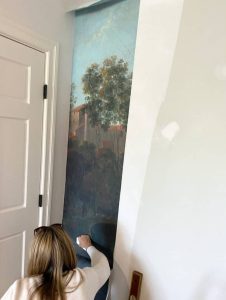
- Peel and Stick: Start from the top corner, peel off the backing, and stick the mural to the wall.
- Smooth Out Bubbles: Use a squeegee or credit card to smooth out any bubbles or wrinkles.
- Trim Excess: Use a utility knife to trim any excess material.
Tips for Avoiding Bubbles and Wrinkles
- Apply the mural slowly and evenly.
- Use a squeegee to press out air bubbles as you go.
- If you encounter a wrinkle, gently peel back the mural and reapply.
IV. Routine Maintenance and Cleaning
Regular Dusting and Wiping
Dust your mural regularly with a soft cloth. For a deeper clean, use a damp cloth. Avoid soaking the mural.
Using Mild Cleaners for Stubborn Stains
For stubborn stains, use a mild cleaner. Avoid harsh chemicals that can damage the mural.
Avoiding Abrasive Materials and Harsh Chemicals
Never use abrasive materials like scrub brushes or harsh chemicals. These can scratch or discolor the mural.
V. Environmental Factors to Consider
Controlling Humidity Levels
High humidity can cause the mural to peel. Use a dehumidifier if necessary to maintain a stable environment.
Protecting the Mural from Direct Sunlight
Direct sunlight can fade the colors of your mural. Use curtains or blinds to protect it from UV rays.
Maintaining Consistent Room Temperature
Extreme temperature changes can affect the adhesive. Keep the room at a consistent temperature.
VI. Addressing Common Issues
Fixing Peeling Edges and Corners
If the edges or corners start to peel, use a small amount of adhesive to reattach them. Press firmly to ensure they stick.
Reattaching Loose Sections with Adhesive
For larger loose sections, apply a thin layer of adhesive to the back and press firmly against the wall.
Preventing and Removing Air Bubbles
If air bubbles appear, use a pin to puncture them and then smooth out the area with a squeegee.
VII. Long-Term Care Tips
Periodic Inspections for Early Damage Detection
Regularly inspect your mural for any signs of damage. Early detection can prevent further issues.
Reapplying Adhesive or Using a Sealant
If the adhesive starts to weaken, reapply a thin layer or use a sealant for extra protection.
Avoiding Placement Near Heat Sources
Keep your mural away from heat sources like radiators or stoves, as heat can weaken the adhesive.
VIII. Enhancing Durability
Choosing High-Quality, Durable Materials
Invest in high-quality murals made from durable materials. They may cost more upfront but will last longer.
Investing in UV-Resistant and Fire-Rated Murals
Consider UV-resistant murals to pr her explanation event fading and fire-rated ones for added safety.
Considering Additional Protective Coatings
Apply a protective coating to your mural to shield it from dirt and damage.
IX. Conclusion
Proper care and maintenance are crucial for extending the life of your peel and stick mural. By following the steps outlined in this article, you can ensure that your mural remains vibrant and intact for years to come. Regular cleaning, addressing environmental factors, and periodic inspections will help you enjoy your beautiful mural for a long time.

Meet Hi there! I’m Jason Noon, a passionate Product Consultant specializing in mural design and customization. Welcome to MuralMoxie, where creativity meets craftsmanship. My journey into the world of murals began over a decade ago. I started as a graphic designer, but my love for large-scale art installations quickly took over.


